Replacing a cell phone screen might seem intimidating, but with proper guidance and tools, you can do it yourself. This article will guide you through every step, ensuring you have what it takes to replace your screen successfully. Whether you’re a DIY enthusiast or a beginner, this guide will be your companion in the process.
Introduction
Experiencing a broken phone screen can be frustrating. Instead of opting for an expensive repair or replacement service, you can learn the process of replacing it yourself. By doing so, you gain valuable skills and save money. This comprehensive guide will provide you with the necessary knowledge to perform this task confidently.
Understanding Your Cell Phone Screen
Before you jump into the replacement process, it’s vital to comprehend the type of screen your phone uses. Knowing this ensures you purchase the correct screen replacement and navigate the repair more effectively.
Different Types of Phone Screens
Most phones come with either LCD (Liquid Crystal Display) or OLED (Organic Light Emitting Diode) screens. LCDs, often found in budget models, deliver decent quality at lower costs. OLED screens, common in high-end models, offer superior color and contrast. Identifying your screen type is crucial for compatibility and quality.
Identifying Your Screen Type
Check the specifications of your phone model online or refer to the user manual to determine your screen type. This information is crucial for buying the right screen and preventing compatibility issues during replacement.

Tools and Materials Needed
Having the correct tools is crucial for a seamless screen replacement. These tools enable you to safely disassemble and reassemble your phone without causing further damage.
Essential Tools for Screen Replacement
- Screwdriver set: Includes small Phillips and flathead screwdrivers needed for removing screws.
- Plastic prying tools: Used to open the phone casing without causing scratches.
- Tweezers: Helpful for handling small components safely.
Recommended Screen Replacement Kits
Screen replacement kits are available online and often include necessary tools such as screwdrivers, prying tools, and adhesive strips. Investing in a high-quality kit streamlines the process and ensures you are well-equipped.
Preparing for Screen Replacement
Proper preparation is key to a smooth replacement process and minimizing potential damage. Taking time to set up your workspace and understanding safety precautions is essential.
Setting Up Your Workspace
Choose a clean, well-lit area for work. Use a soft cloth or mat to prevent scratches on your phone or workspace surface. Ensure all your tools and components are within reach before starting.
Safety Precautions to Consider
- Data backup: It is vital to back up important data to prevent loss during repair.
- Power off: Turn off your phone to avoid damage to internal components.
- Anti-static measures: Wear an anti-static wrist strap to protect against static electricity.
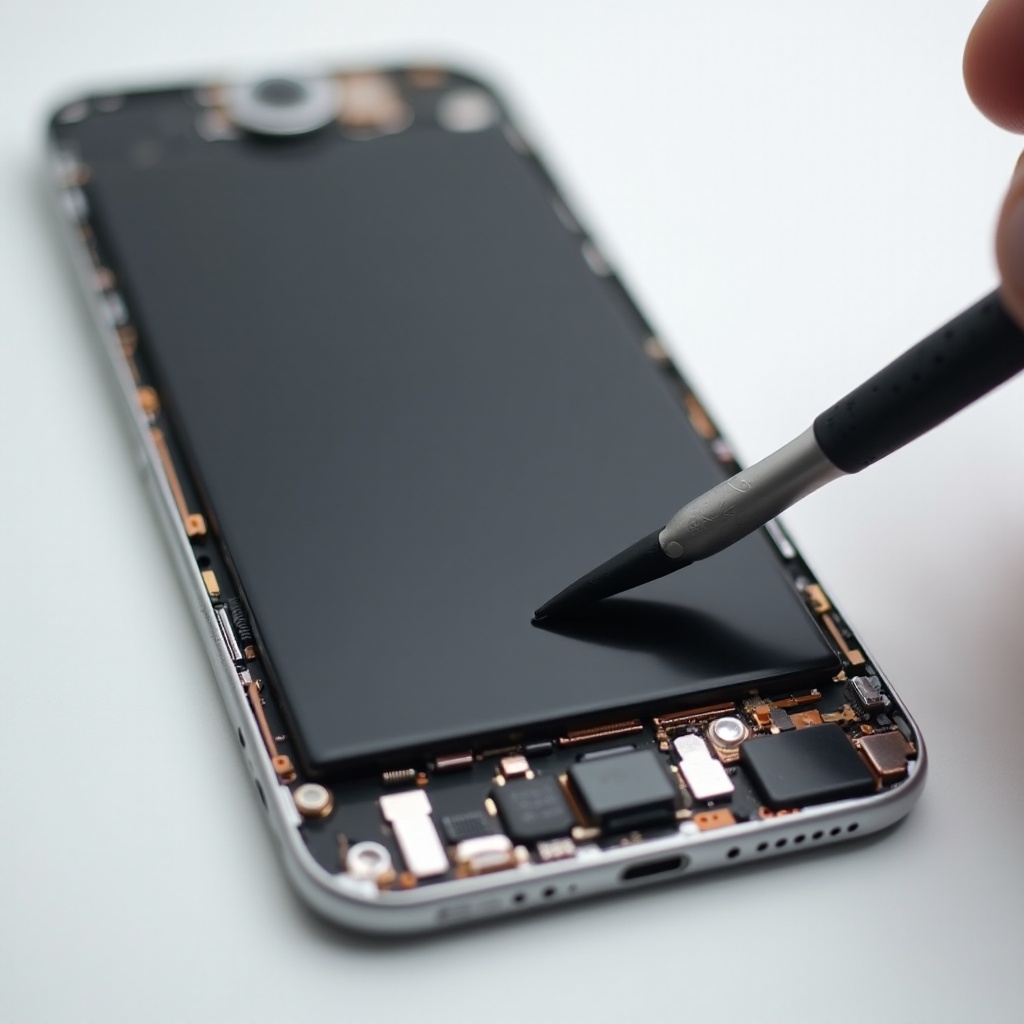
Step-by-Step Guide to Replacing Your Phone Screen
With your workspace and tools ready, you can now follow these steps carefully to successfully replace your phone screen.
Step 1: Power Down and Remove Back Panel
Power off your phone and remove the back panel and screws that secure the battery and components.
Step 2: Disconnect the Battery and Other Components
Carefully use tweezers or a prying tool to disconnect the battery and components like the camera and speaker from the motherboard.
Step 3: Gently Remove the Damaged Screen
Use prying tools to detach the damaged screen, taking care not to damage cables or other fragile components.
Step 4: Install the New Screen
Align and attach the new screen to your phone using adhesive strips or screws. Reconnect all internal components, ensuring they are secure.
Step 5: Reassemble Your Phone and Test
Replace the back panel and power on your phone. Test the new screen to verify functionality and perform any necessary calibrations.

Troubleshooting Common Issues
Even with careful preparation, issues may arise after replacing the screen. Quickly identifying and resolving these problems ensures your phone functions properly.
Screen Doesn’t Turn On
Ensure all connections are secure, as a loose cable can prevent the screen from receiving power.
Touch Sensitivity Problems
Check for loose connectors and recalibrate the screen through your phone settings if touch functionality is compromised.
Post-Replacement Care and Maintenance
Taking care of your phone after replacement is crucial to maintaining functionality and screen quality.
Testing Your New Screen
Test all features of the screen, ensuring touch sensitivity and display quality meet expectations. Verify color accuracy and responsiveness.
Tips for Prolonging Screen Life
- Screen protector: Protects against scratches and minor impacts.
- Durable case: Provides additional protection from drops and bumps.
- Regular cleaning: Maintains clear visibility by removing dirt and fingerprints.
Conclusion
Replacing your phone screen successfully demands preparation, patience, and precision. With the information and guidance provided, you can save money and extend your device’s life. Embrace this DIY opportunity to gain practical skills and personal satisfaction.
Frequently Asked Questions
How long does it take to replace a cell phone screen?
The process typically takes 30 minutes to an hour, depending on your familiarity with phone repairs and the complexity of the device.
Can I replace the screen on any phone model myself?
Most screens can be replaced; however, some models, especially unique designs, may require specialized skills or tools.
Is it cheaper to replace the screen myself or get a professional repair?
DIY replacement is generally cheaper as it avoids labor costs associated with professional repair.